I've completed the witch, and it was quite an experience. From it, I've learned that I'm not that much of a fan when it comes to painting black. It's very hard to do the shadows. I knew this from the capes on my scouts actually, but I tried it anyway. I applied some of the same techniques too. Anyway onto how this was put together, so my friend can do his own! If you don't care about the process, feel free to gloss over the pictures =) Just a note, I've used Citadel Paints for the entire model. All color references will reference them.
The horse, as stated, was a pain in the rear. After spraying the creature black, I did go about painting an extra coat of Chaos Black onto it. The reason being, it helps keep the creature consistent as far as looks goes. If I'd left it with the spray can black, it would look flat and appear to have an entirely different texture compared to the rest of the paint I'll be putting on. Now because the creature is black, it's very hard to add shadows. Instead, you just give it good highlights. I applied Shadow Grey for the most part to high light muscle tones and the tail hairs. Any defined ridges or veins also received this treatment. To high light even more defined ridges, I made use of Codex Grey. Just apply it on the high arc of the tail, the nostrils, and bits of the tail ends and mane.
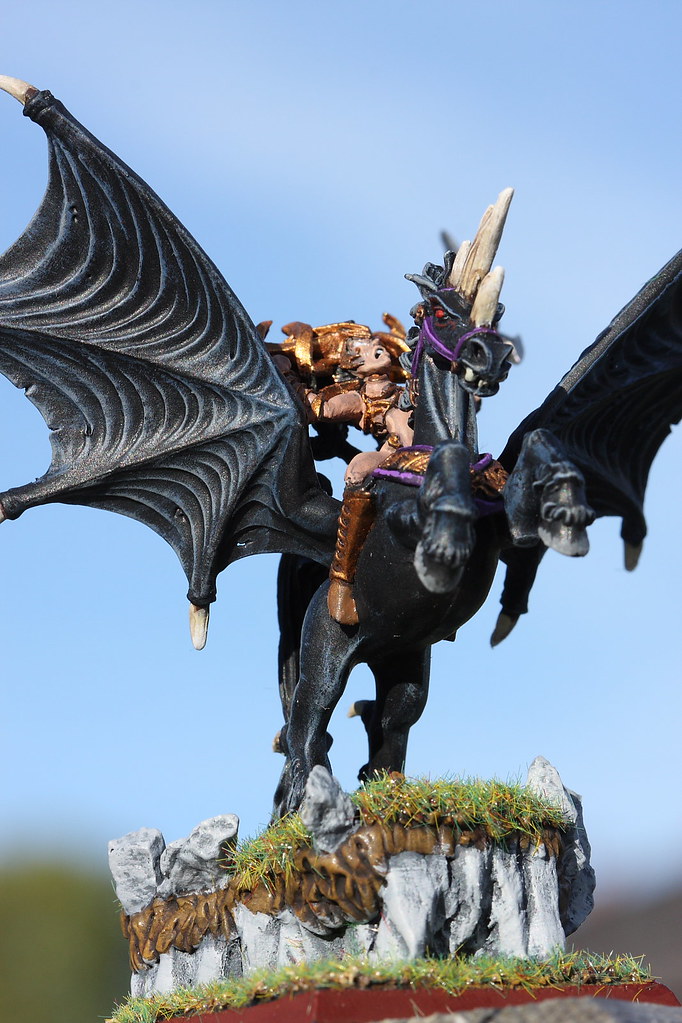 The hooves were done exactly like my Tyranids. Paint them a dark base coat of grey and then apply some Badab Black to darken. Here's the trick! Brush your strokes up toward the horses leg, and set the horse upside down. This way the wash clings to the upper ridges where hoof turns to fur and darkens that crevice. Finally, touch up the hooves with Codex Grey. Paint in strokes down to the toe of the hoof. Take Codex Grey with a little Skull White, and repeat again but don't go all the way up to the end of the last coat. Do this as much as you feel is proper.
I decided the horse's eyes should be a glowy red. This was a lot of fun actually. I think it worked, but you tell me. Painted the eye ball Blood Red obviously, but then I took a mix of that and some Scorched Brown. Not a ton, just enough to darken the red a bit. Scab Red might work just as well. I took this and looked around the eye socket applying the color to the inside ridges anywhere I could see fit. The idea is that the color from the eyes is bouncing off of the fur of the animals face and cheeks.
The reigns were easy. Simply Liche Purple as a base, and then mix a little skull white and use that as a high light on the edges. There's no dry brushing at all on this model. All of it was done wet brush style. Just take your time, be careful!
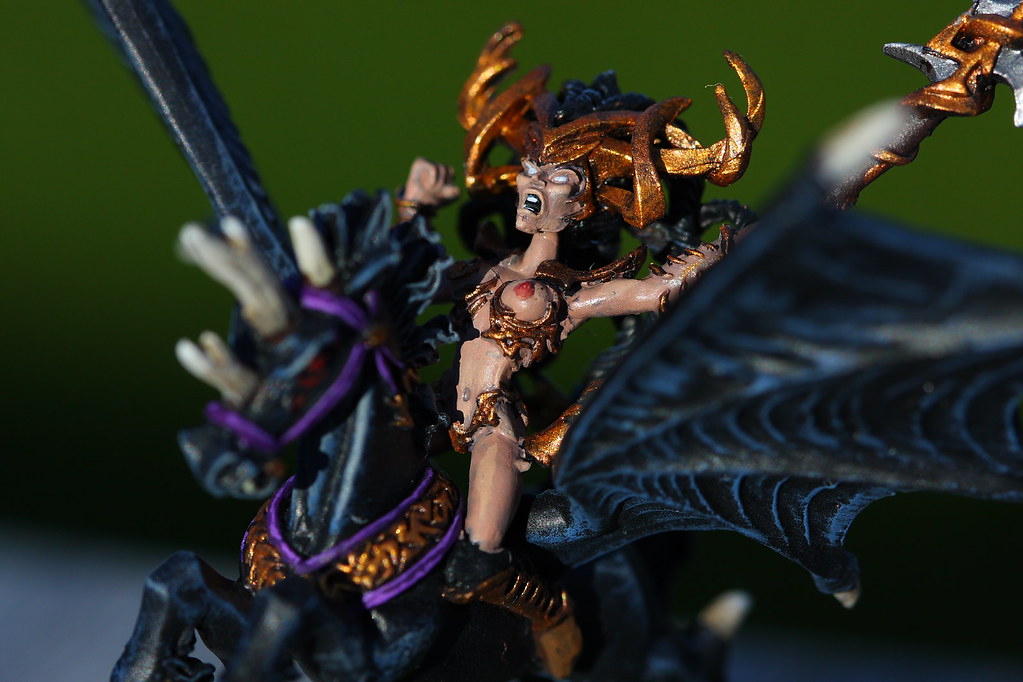
So, onto the naked chick on top! I used my technique from Tyranids oddly enough to do up her skin. I used Tallarn Flesh as a base for her skin, and high lighted with Elf Flesh. Use Elf Flesh paint to high light her muscle tones. AND.... *giggle* be sure to high light her butt too! *Winks* and boobs! Every rounded surface should have a touch of Elf Flesh on it! Tee hee. Once done though, take one of Citadels new washes, Asurmen Blue, and water it down a bit before applying. Don't water to much, just make sure you aren't applying it straight out of the pot. That is, unless you want her to look like a smurf.
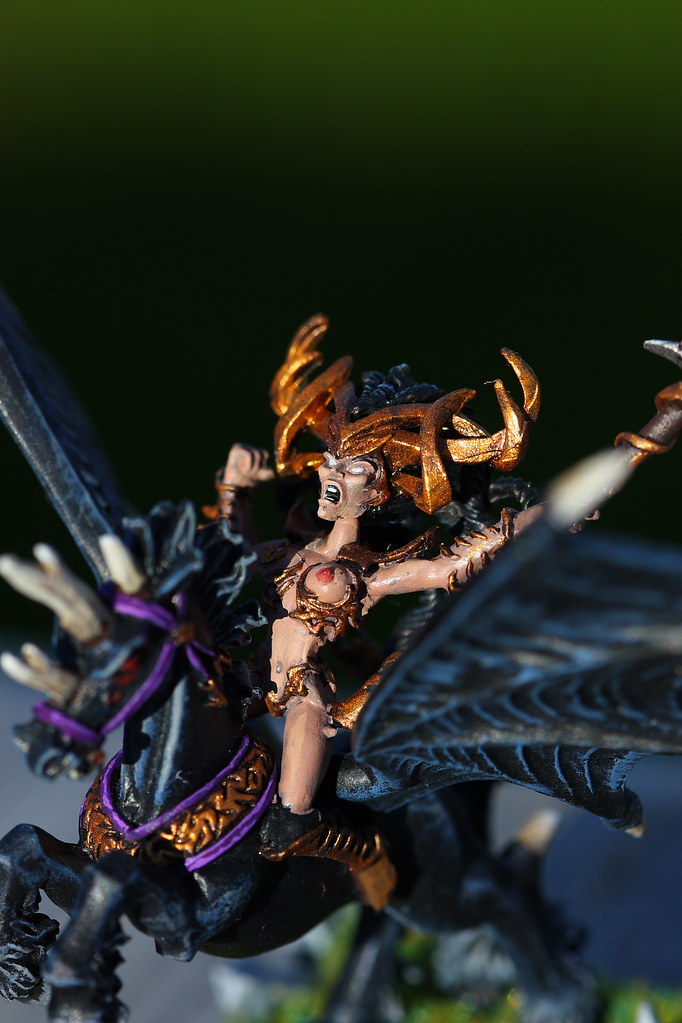 The eyes, the teeth, those are all done with a careful hand. I used skull white, so she's pupilless. Half of the reason behind that is because I didn't want to paint pupils. Though the next step is all that metal. Gold. I've done enough Salamander Marines now that Gold isn't that hard of a color to do. Granted, I'm no master and still don't know how to work on flat surfaces, but intricate details are easy enough. Base all bits meant to be gold with Tin Bitz, and then drag a wet brush with Brazen brass over those. Once all of that is done, just drag a brush with Shining Gold on it across all the bits you want high lighted. That should do the trick. It's very easy to do, just takes time and requires a careful hand. If you happen to get any of it on the flesh, just water down some Tallarn Flesh and paint back over the mistake. It should fix it.
Right, so, zee bewb! Simply Dark Flesh with a touch of Elf Flesh in it. Be careful, to much Elf Flesh will turn it pink real fast. So just mix in a little bit at a time until you get what you think is the right shade of color.
Now, the part I want to talk about the most! The base! This was the most fun I've had through out this project, and I intend on making use of it more often with some of my more important characters! It was a real blast, and I think my current one turned out really well. So here's a before and after real quick.

Now to create the top I used Green Stuff. Take a generous wad and build a proper top. I made sure that some flowed over the top of what I planned for rocks below. With the putty tool that you can buy at a Games Workshop shop and a little water, I went around the edges like one would a pie crust they were backing. I made little indentations and tried to form the green stuff to the foam rock below. Every effort was made to make sure the Green Stuff would look like "Earth" atop a rock.
Now, this is a touchy spot. Take the horse and situate it atop the Green Stuff where you want it. Be sure to press it in firmly to give the green stuff the slots for the hoof pegs. When you pull the horse out, be extra careful and try to keep the green stuff on the foam. Mine nearly came off when I did this, but the putty tool really helped.
As a final touch, I grabbed some stones from outside and glued them into the green stuff. It's alright to use Super Glue on this part. The supper glue should only be touching the green stuff anyway. Put some Super Glue on the green stuff and then press the rock into place. Once all this settles, use P.V.A. glue and put the sand down on the base and I did it on top as well. Let it all dry.
Remember, the foam will melt if you spray this black. So instead I had to paint the whole thing Chaos Black myself. Be sure to go over it when it's dry. But painting up the base is pretty easy. For the gravel bits, paint over it with Scorched Brown, followed by a mix of Snakebite Leather and Scorched Brown, followed by Snakebite Leather... Then that mixed with some bleached bone... and finally... bleached bone. Remember each bit of color you dry brush on and each time you do it with less and less if possible. It's really hard to master, and I've yet to do it properly. While you're doing this, be sure to do the same treatment to the Green Stuff as well if you want that to appear like "Dirt."
Once the ground is done, work the rocks. Take Adeptus Battlegrey Foundation first, then use Codex Grey, and finally mix some Skull White with Codex Grey and keep working your rocks until they're highlighted the way you want them to be.
Now, I personally applied a lot of grass to the top and bottom. That's just my preference. I wanted to give it that grassy hill top look. Though others really like to go all out. It is important either way that you paint up the base even if you are going to cover it up, as some may very well show through.
Once all is dried and settled, put Super Glue on the horses hoof pegs and plant the pair into the holes on the top base. Don't be afraid to apply pressure, she'll fit!
So, that's the creation of Morathi! Time to finish up some Gene Stealers to post next weekend once I've finished with them. Thanks for reading!
Why didn't my comment stick before?
ReplyDeleteVery cool, anyway :)