More little guys done. I read a strategy about using drones in conjunction with stealth suits, and so I decided I would actually give that a try. In order to try that strategy by MY standards, that means I'd like to have some drones painted up in the color scheme my stealth suits are. And so, 4 stealth drone were crafted! I need to do more, actually. Since I have 3 stealth suits, I need 6 total drones. Another day though. This will do for now. It took me an evening to paint these guys up. They're really not that hard.
So I decided to try something different. I'll show you exactly how I went about painting them almost step by step. I kinda got a little excited at the end and didn't document the bases entirely, but, hey... This is more than I've done before.
So first I usually base everything black. Even tau warriors or battle suits I'll start basing black now. Every time I try a white primer or better, a yellow primer for tau, specs seem to come out and really mess up my model. I've tried White as well, and have had no luck. So .... back to black... It works, I trust it, and I now have an airbrush so it's far easier to get the yellow on real good and even.
Here I've painted black where it needs to be black, and brown where it needs to be brown. The brown I use is a base, so it has extra pigment and when it dries it looks a bit flat.
Once I've done that, I use "Dark Flesh" from Vallejo to get the redish brown I want. It's taken a great deal of time to figure this out, and I have no idea why. It looks fantastic in the end though and I'm quite happy with it. Other attempts were too brown, as you can see on my Tau Battle suit.
Now I apply a bit of dry brushing to get the simple high lights. Dry brushing black with a blue like gray works really well. It's not so bright it's blinding, but it's enough that people will notice it.
Once that's done, I'll literally hand paint the high lights for the actual drone. This is pain staking really, and for me it's highly prone to errors and flaws. I've worked pretty hard here to keep the flaws to a minimum but... it happens. You'll see I also put the gold on too. Gold like this takes 2 steps. First you use bronze, and second you use the gold you like. There's other ways too, like if you're shooting for REALLY bright gold, you can do silver first with gold on top. I didn't high light it, didn't see the need.
Ah, one more step I missed. I've now put a wash of black over the black bits, and a wash of Devlan Mud mixed with the Red Baal wash for the brownish parts. I think I went over board, as you can see patches of heavier shading. This is bad. Next time I'll do better, get it more even.
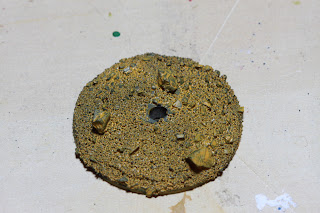
So here's three pictures of the base, and it looks horrible. In fact, I really didn't want to include it in here, and this is also where I got a little excited. I can't recreate the awesome sand texture I got with my Fire Warriors apparently, which makes me sad. Anyhow, this is literally just yellow base paint, with plague brown later, high lighted with a mix of bone white and plague brown at various levels.
It eventually comes out looking like this!


No comments:
Post a Comment